

 Click it and Unblock the Notifications

Latest Updates
-
 Samantha Ruth Prabhu Expecting Her First Child? Viral Video From Latest Appearance Fuels Buzz
 -
 We Asked AI What You Should Never Ask It. Here Is What It Said
 -
 Halwai Style Sweet Milk Cake Recipe: A Taste of Tradition
 -
 Akshar Yoga Kendraa Sets 21 Guinness World Records On International Yoga Day 2026
 -
 Acne Awareness Month: The Cheat Sheet for Salicylic Acid, Benzoyl Peroxide and Retinoids
 -
 Inside Anshula Kapoor’s Pre-Wedding Style: Kapoor Family’s Ethnic Fashion Moments
 -
 Forgetting Small Things Lately? Expert Explains Why It May Not Be More Than Ageing
 -
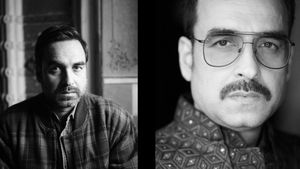 Pankaj Tripathi's Brother Attacked With Axe in Bihar Village, Referred to Patna for Treatment
 -
 Street Style North Indian Matar Kulcha Recipe: A Flavorful Lunch
 -
 Dhumavati Jayanti 2026: Everything About This Rare Mahavidya Festival And Its Significance


Vasisthasana (Side Plank Pose) To Strengthen Arms & Legs
Though it sounds quite lethargic to strengthen your arms and legs; however, technically, if you look into it, your entire body depends on these two important body parts.
It's extremely important to have strong arms and legs for a healthy survival. It also has psychological impact on you. The slightest pain in any of them can make you feel irritated and at discomfort.
We are here to discuss about the Vasisthasana or the side plank pose, which helps in strengthening the arms and legs.
Also Read: Eka Pada Rajakapotasana (One-legged Pigeon Pose) To Improve Flexibility Of Hip Muscles
This asana has also been derived from the Sanskrit term "Vasistha" which means most excellent, best and richest.
This asana therefore helps maintain the two most supreme parts of the body and makes sure to strengthen these parts for an ideal well-being.
Have a look at the step-wise procedure that you need to follow in order to master this yoga asana.
Step-By-Step Procedure To Perform The Asana
Step1. Lie down in the normal position and shift towards the left side. While turning left side, keep your right foot on the top of the left.
Step 2. Keep your right hand on your right hip, and turn your torso to the right side. Support your body weight on the outer left foot and left hand.

Step 3. Just be careful about the position of the hand, so that it shouldn't be directly below the shoulder. Make sure it is slightly in front of the shoulder. Now straighten the arm by tightening the tricep muscles and press your hand firmly on the floor.
Step 4. Just stretch your body as much as you can and strengthen your thighs, along with pressing the heels towards the floor. Align your entire body into one long, diagonal line from the heels to the crown.
Step 5. Raise your other hand up towards the sky.

Step 6. Maintain this position for at least 30 seconds in the beginning and keep on increasing the time limit. The way of getting back to normal position is by keeping your upper hand down, and slowly getting back to the side pose. Just inhale.
Step 7. Repeat the same from the other side by following the same steps.
Initially, people may find it a bit difficult to start with this pose. You first need to learn how to balance yourself and may take a support of the wall. Repeat the same steps as mentioned above.
Then, gradually, start getting away from the wall and practice the pose independently.
Benefits Of The Asana
• Helps to strengthen the legs and arms
• Strengthens the belly and wrists
• Stretches the body overall
• Tightens the underarms as well
• Improves balance
Also Read: Makara Adho Mukha Svanasana (Dolphin Plank Pose) To Tone Abdominal Muscles
Caution
Those who have wrist or shoulder injury or even spine problem shouldn't try to play with your body. Before the onset of any exercise or yoga, you must consult a doctor or a yoga expert and make sure the condition doesn't worsen.
You intend to practice yoga for better health, not for further deterioration. If you aren't comfortable in performing the pose, kindly don't proceed. Just relax and meditate instead.
Disclaimer: The information provided in this article is for general informational and educational purposes only and is not intended as a substitute for professional medical advice, diagnosis, or treatment. Always seek the advice of your physician or a qualified healthcare provider with any questions you may have regarding a medical condition.