

 Click it and Unblock the Notifications

Latest Updates
-
 7 Foods That May Boost Sperm Count in 90 Days, According to a Fertility Specialist
 -
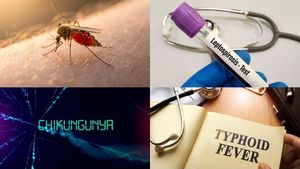 10 Monsoon Diseases To Watch Out For And How To Prevent Them
 -
 Rapper Santy Sharma’s YouTube Channel Deleted After Viral Remarks: What We Know
 -
 Every Diet Works Until It Doesn't: Here's What Your Doctor Isn't Telling You About Long-Term Weight Loss
 -
 Is Diabetes Only An "Old Age Disease"? What Young Indians Must Know
 -
 FIFA World Cup 2026 Final: Spain's Golden Night, Mbappé's Record Boot, and Messi's Last Dance
 -
 Naseeruddin Shah Birthday Special: How He Became the Face of Indian Parallel Cinema
 -
 Arunima Sinha Birthday Special: The Woman Who Lost A Leg And Went On To Conquer Everest
 -
 Alia Bhatt's Ethnic Outfits Stole Every Spotlight At Best Friend Akansha Ranjan Kapoor's Wedding Celebrations
 -
 Jagannath Rath Yatra 2026: 10 Iconic Odia Delicacies Every Visitor Must Try In Puri


A Beginners Guide On How To Do A Gel Manicure At Home
To look beautiful is more than putting on a stunning make-up look. Your overall look also entails your hands. Soft, healthy and beautifully-painted nails attract all. It also makes you feel good about yourself. Apart from the beauty factor, it also reflects and aids to your health. Getting a manicure does all that and some more.
You might have noticed a surge of various kinds of manicure in the parlours near you. That is the ladies realising the impact and importance of a manicure. Of all these kinds, one that has become a cult favourite is gel manicure. We love to see it and get it. Unfortunately, we can't always go for it. There is either time constraint or it is too heavy on the pocket. But, do you really need to take a trip to the parlour to get the gel manicure done? We say not!

With the right equipment, the right technique and a whole lot of practice, you can easily do a gel manicure at home. There sure is an investment in the beginning, but in the long run, it is convenient and pocket-friendly. So, let's begin.

Step 1:
Use the nail paint remover to get rid of any previous polish on your nails. If it is an embellished or glittery polish and you are finding it hard to remove, soak the cotton ball with the nail paint remover and place it on the nails for a couple of minutes. Once done, it shouldn’t be too difficult to remove your polish.

Step 2:
Apply the cuticle cream on your cuticles and let it get absorbed for a few minutes. Wipe the cream and push your cuticles back using the cuticle pusher. Be gentle while pushing the cuticles and don't press it too hard into your skin.

Step 3:
Cut and file your nails to the desired shape and size. It is the best time to shape your nails as it would ruin the manicure if you do it afterwards.

Step 4:
Wash your hands with a mild cleanser and pat them dry.

Step 5:
Buff your nails using the nails buffer. This will roughen up your nail bed and help the polish to stick to your nails easily.

Step 6:
Wipe your hands clean using the towel.

Step 7:
Apply a thin coat of base gel polish on your nails. Cure it under the UV lamp for about 2 minutes. Make sure you apply a very thin base coat. It will help in layering the polish later.

Step 8:
Apply the gel polish on your nails. Make sure it does not spread to your cuticles or the skin surrounding your nails or they will start to peel. If you do get it on your cuticles or the skin around, use the nail polish remover with a cotton swap to wipe it immediately. Cure the polish under the UV lamp for about 2 minutes.

Step 9:
Apply the second coat of the polish and cure it again under the UV lamp for about 2 minutes. If needed, you can go for a third coat of the polish as well. Remember to cure it under the UV lamp for a couple of minutes.

Step 10:
Seal the polish in place by applying the gel coat over it. Cure it under the UV lamp for about 2 minutes and you are done.