

 Click it and Unblock the Notifications

Latest Updates
-
 Gangaur 2026: Marriage Delays Holding You Back? This Simple Remedy Can Move Wedding Plans Forward
 -
 Social Media Influencer Yuvraj Dua’s Reel About His ‘Modi-Paglu’ Papa Goes Viral, PM Modi Reacts Online
 -
 Matsya Jayanti 2026 Falls On March 21: Rituals, Muhurat, And The Meaning Behind Vishnu’s Avatar
 -
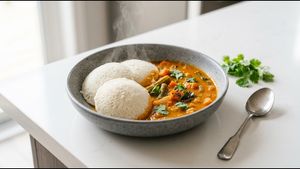 Soft Idli Sambar Recipe: Your Ultimate Breakfast Delight
 -
 Horoscope for Today March 21, 2026 - Fresh Start & Clear Choices
 -
 Pigmentation Before Peak Summer: Expert Insights On Why Indian Skin Is More Vulnerable
 -
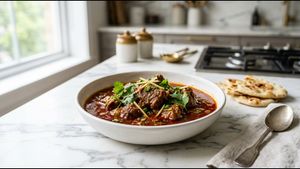 Mutton Curry Recipe: The Original Method Revealed
 -
 Ranveer Singh Spotted Wearing ₹22 Lakh Rolex Cosmograph Daytona In Dhurandhar 2, Signals Hamza's Power Shift
 -
 Aloo Tikki Recipe: Add This One Ingredient to Make It Tastier!
 -
 Eid 2026 Trendy Mehndi Designs: From Minimal To Bold Styles That Stand Out This Year


Pav Bhaji Recipe: Master it with One Simple Trick
Many people struggle to recreate the magic of street-style pav bhaji. They often find the flavor is missing something vital. This Homemade Pav Bhaji Recipe reveals the secret to that perfect taste. You do not need any special equipment to get this right. Just follow our simple mashing technique for the best results every single time.
The vibrant red color of restaurant pav bhaji often looks intimidating. Most home cooks think it requires heavy artificial food coloring. However, our secret Veg trick uses a small piece of fresh beetroot. It provides a stunning natural hue without changing the flavor. This simple addition will make your dish look like it came from a professional kitchen.

This recipe focuses on the balance of spices and textures. We use a double-tempering method to lock in the aroma of the pav bhaji masala. This technique ensures that every bite is packed with deep, savory flavors. Your family will surely notice the difference in quality. It is time to master this iconic Indian street food staple at home.
Creating the perfect mash is the most important part of the process. A common mistake is leaving the vegetables too chunky or making them watery. Our method involves mashing the vegetables at two specific stages of cooking. This creates a thick, buttery consistency that coats the pav perfectly. It is the ultimate comfort food for a busy weekend lunch.
Why Everyone Is Talking About This Pav Bhaji Recipe
Pav bhaji has evolved from a simple worker's meal to a global favorite. Its popularity lies in the unique blend of mashed vegetables and butter. This specific version has gone viral because it simplifies the complex street flavors. You can achieve high-end results using your standard stovetop pressure cooker and a flat pan.
The history of this dish starts in the busy streets of Mumbai. Textile mill workers needed a quick and filling meal during their short breaks. They combined leftover vegetables with a spicy tomato base and soft bread. Today, we elevate that humble beginning with high-quality butter and fresh produce. This recipe respects those traditional roots while adding modern clarity.
Texture plays a massive role in why this version is so successful. Most recipes suggest boiling everything together until it becomes a bland soup. We recommend sautéing the aromatics separately before adding the boiled vegetable mash. This step creates layers of flavor that you cannot get from boiling alone. It makes the dish feel much more premium and satisfying.
The choice of butter also sets this recipe apart from the rest. We suggest using cultured butter for a slightly tangy and rich finish. This small change makes a huge impact on the final taste profile. It mimics the high-quality butter used by famous street vendors in India. You will love how it melts into the spicy vegetable gravy.
Recipe at a Glance
| Category | Details |
|---|---|
| Prep Time | 20 Minutes |
| Cook Time | 30 Minutes |
| Total Time | 50 Minutes |
| Servings | 4 People |
| Difficulty | Medium |
| Cuisine Type | Indian |
| Meal Type | Lunch |
| Calories (approx) | 450 kcal |
Ingredients You'll Need for Homemade Pav Bhaji Recipe
Gathering fresh ingredients is the first step toward a successful meal. High-quality vegetables ensure that the base of your bhaji is naturally sweet and flavorful. Make sure your spices are fresh for the best aromatic experience. This list covers everything you need for a complete restaurant-style meal right in your own kitchen.
| Category | Ingredient | Measurement |
|---|---|---|
| Main Ingredients | Potatoes (peeled and cubed) | 3 medium |
| Main Ingredients | Cauliflower florets | 1 cup |
| Main Ingredients | Green peas (fresh or frozen) | 1/2 cup |
| Main Ingredients | Carrots (chopped) | 1/2 cup |
| Main Ingredients | Beetroot (small piece) | 2 inches |
| Main Ingredients | Pav (bread rolls) | 8 pieces |
| For the Spice Mix | Pav Bhaji Masala | 2 tablespoons |
| For the Spice Mix | Kashmiri Red Chili Powder | 1 tablespoon |
| For the Spice Mix | Kasuri Methi (dried fenugreek) | 1 teaspoon |
| For the Spice Mix | Salt | To taste |
| Optional Garnish | Salted Butter | 3 tablespoons |
| Optional Garnish | Fresh Coriander (chopped) | 2 tablespoons |
| Optional Garnish | Red Onion (finely diced) | 1 medium |
| Optional Garnish | Lemon wedges | 4 pieces |
How to Make Pav Bhaji Step by Step
Prep Phase
Begin by washing all the vegetables thoroughly under cold running water. Peel the potatoes and carrots before cutting them into small, even cubes. This ensures that they cook at the same rate in the pressure cooker. Preparing your ingredients in advance makes the actual cooking process much smoother and more enjoyable.
Cooking Phase
- Place the potatoes, cauliflower, peas, carrots, and beetroot into a pressure cooker with two cups of water. Cook for three whistles until the vegetables are very soft and easy to mash.
- Drain the excess water but keep it in a bowl for later use in the gravy. Use a potato masher to crush the boiled vegetables into a smooth and consistent paste.

- Heat a large flat pan or tawa and add two tablespoons of butter and a splash of oil. Sauté the finely chopped onions until they become translucent and slightly golden brown in color.
- Add ginger-garlic paste and chopped green chilies to the pan and fry for one minute. Stir in the finely chopped tomatoes and cook until they become soft and start releasing oil.
- Mix in the pav bhaji masala, red chili powder, and salt with a little bit of reserved water. Add the mashed vegetable mixture to the pan and combine everything thoroughly using your spatula.
- Use the potato masher again to mash the mixture while it simmers on the hot pan. This step is crucial for achieving the signature smooth texture found in professional Indian street food.
- Add more butter and the kasuri methi while stirring the gravy on low heat for five minutes. Slice the pav rolls in half and toast them on a hot griddle with plenty of butter.

Finishing Phase
The final phase is all about the presentation and the perfect temperature. Ensure the bhaji is steaming hot when you serve it to your guests. Add a generous dollop of butter right in the center of the bowl. Top it with freshly chopped coriander and serve immediately with the warm, buttered pav rolls.
Pro Tips for Veg Pav Bhaji
- Most common mistake: Adding too much water at the beginning makes the bhaji very runny. Always add water gradually to maintain a thick and scoopable consistency for the bread.
- Secret technique: Mash the bhaji directly on a flat iron tawa if you have one. The high surface area helps in caramelizing the vegetables and intensifying the overall savory flavor.
- Storage tip: You can store the bhaji in an airtight container for up to three days. When reheating, add a splash of water and a bit of butter to restore the texture.
- Variation suggestion: For a Jain version, replace the potatoes with raw bananas and skip the onions and garlic. The taste remains surprisingly similar and very delicious for everyone to enjoy.
- Serving suggestion: Always serve with a side of crunchy raw onions and a squeeze of fresh lemon. The acidity of the lemon cuts through the richness of the butter perfectly.
Make This Pav Bhaji Tonight
There is nothing quite like a plate of hot pav bhaji on a relaxing afternoon. This recipe brings the authentic taste of Mumbai streets directly into your dining room. It is a fun and interactive meal that everyone in the family will love. You can finally stop searching for the perfect restaurant version now.

The combination of spicy gravy and buttery bread is truly a match made in heaven. Your friends will be impressed by the professional look and deep flavor of your dish. Remember that the secret lies in the quality of the butter and the mashing. Save this recipe and share it with someone who needs it!


