

 Click it and Unblock the Notifications

Latest Updates
-
 Happy Birthday Rashmika Mandanna: Steal Her White Looks For Easter 2026 Festive Parties And Celebrations
 -
 Horoscope for Today April 05, 2026 - Small Choices Guide Calm Momentum
 -
 Happy Easter 2026 Wishes: Top 50+ Messages, Status, Captions And Posts To Share With Family And Friends
 -
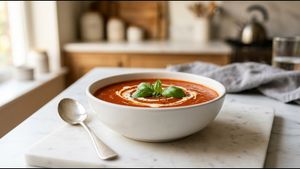 Comfort Style Creamy Blend Tomato Soup Recipe
 -
 Rashmika Mandanna’s “Now It’s Us Three” Post Sparks Speculation Ahead of Anime Awards 2026 Return
 -
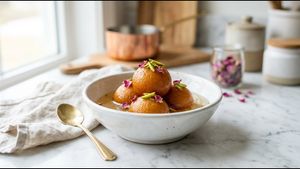 The Softest Ever Homemade Gulab Jamun Recipe
 -
 Where To Eat This Easter 2026: From Chef-Led Experiences To Traditional Feasts Across India
 -
 International Carrot Day 2026: The Hydrating, Skin-Loving Vegetable To Eat More This Summer
 -
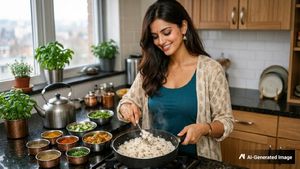 Fluffy Jeera Rice Every Time: The Simple Trick You Need To Know
 -
 Parveen Babi 72nd Birth Anniversary: When A Modern, Unapologetic Style Icon Took Over Bollywood


Paneer Paratha Recipe: Crispy Outside, Soft Inside Perfection
Making a perfect paneer paratha is a true culinary art. Many home cooks struggle with soggy fillings or broken dough. This Paneer Paratha Recipe solves those common kitchen problems. You will learn the secret to a crispy outer layer today. This recipe ensures a soft and flavorful center in every single bite.
Traditional breakfast often feels repetitive after a few days. Adding a delicious veg option brings excitement back to your table. Our specific technique prevents the paneer from leaking during the rolling process. You will achieve that coveted restaurant-style texture right in your own kitchen. Follow these simple steps for a breakfast masterpiece.

The secret lies in the moisture content of the cottage cheese. Most people use paneer that is too wet for the filling. This leads to a messy and sticky dough while rolling. Our method focuses on dry spices and finely crumbled paneer. This creates a stable filling that stays inside the golden crust.
Texture is the most important part of a great paratha. You want a crunch when you first bite into it. However, the inside must remain tender and melt in your mouth. This balance is what makes our recipe stand out from others. Your family will surely notice the professional quality of this dish.
Why Everyone Is Talking About This Paneer Paratha Recipe
This recipe has gained popularity because of its reliable results. Many recipes fail to explain the importance of dough resting. Resting the dough allows the gluten to relax significantly. This makes the rolling process much easier for any home cook. You will not face any resistance from the wheat dough.
The flavor profile is carefully balanced to suit everyone. We use a specific blend of aromatic Indian spices. These spices enhance the mild taste of the fresh paneer. They do not overpower the delicate flavor of the dairy. Every ingredient serves a purpose in creating a harmonious meal. This balance makes it a favorite for children and adults.
Another reason for its success is the cooking technique. We suggest using a combination of oil and ghee. This creates a unique aroma and a superior golden color. The parathas stay soft even after they have cooled down. This makes them perfect for school lunch boxes or office meals. You will love the versatility of this easy breakfast.
The nutritional value of this veg dish is also impressive. Paneer is a great source of protein for vegetarians. Combined with whole wheat, it provides long-lasting energy for your day. It is a wholesome meal that keeps you full for hours. You can enjoy a restaurant-quality meal while staying healthy at home.
Paneer Paratha Recipe at a Glance
| Feature | Details |
|---|---|
| Prep Time | 20 Minutes |
| Cook Time | 20 Minutes |
| Total Time | 40 Minutes |
| Servings | 4 People |
| Difficulty | Medium |
| Cuisine Type | North Indian |
| Meal Type | Breakfast |
| Calories (approx) | 280 kcal per paratha |
Ingredients You'll Need for Paneer Paratha Recipe
Gathering fresh ingredients is the first step toward success. Use high-quality whole wheat flour for the best dough texture. Fresh paneer provides a much better taste than older blocks. Make sure your spices are fresh and fragrant for maximum flavor. Here is everything you need to prepare this classic Indian breakfast.
| Category | Ingredient Name | Quantity |
|---|---|---|
| Main Ingredients | Whole Wheat Flour (Atta) | 2 Cups |
| Main Ingredients | Grated Paneer | 250 Grams |
| Main Ingredients | Water | As Needed |
| Main Ingredients | Ghee or Oil | 4 Tablespoons |
| For the Spice Mix | Finely Chopped Green Chilies | 2 Pieces |
| For the Spice Mix | Garam Masala | 1/2 Teaspoon |
| For the Spice Mix | Amchur (Dry Mango Powder) | 1/2 Teaspoon |
| For the Spice Mix | Salt | To Taste |
| Optional Garnish | Fresh Coriander Leaves | 2 Tablespoons |
| Optional Garnish | Butter Cube | For Topping |
How to Make Paneer Paratha Recipe Step by Step
Prep Phase
- In a large mixing bowl, combine the flour and salt. Add water slowly to knead a soft, smooth dough. Coat the dough with a little oil and rest it.
- Grate the fresh paneer into a separate glass bowl. Ensure there are no large chunks in the cheese. Large pieces will tear the dough during the rolling process.

Cooking Phase
- Add the chopped chilies, coriander, and spices to the paneer. Mix everything gently with a spoon to combine the flavors. Do not mash the paneer too hard while mixing.
- Divide the rested dough into eight equal-sized round balls. Take one ball and flatten it into a small circle. Place two tablespoons of the paneer mixture in the center.
- Bring the edges of the dough together to seal the filling. Pinch the top to ensure no filling can escape out. Flatten the stuffed ball gently with your palms first.
- Dust the stuffed ball with a little dry wheat flour. Roll it out into a six-inch circle using a pin. Use a light hand to avoid any dough breakage.
- Heat a modern flat tawa or pan over medium heat. Place the rolled paratha on the hot surface carefully. Cook for one minute until small bubbles appear on top.
- Flip the paratha and spread ghee on the cooked side. Press the edges with a spatula for even browning. Cook both sides until golden brown spots appear clearly.

Finishing Phase
- Remove the hot paratha from the pan onto a plate. Top it with a generous cube of fresh butter immediately. Serve it hot with cold yogurt or spicy pickle.
Pro Tips for Veg Paneer Paratha Recipe
- Most common mistake: Using wet paneer makes the stuffing very soggy. Always pat the paneer dry with a paper towel first. This ensures the filling stays firm and easy to handle.
- Secret technique: Add a pinch of carom seeds to the dough. This aids digestion and adds a subtle nutty aroma. It complements the richness of the paneer perfectly.
- Storage tip: Stack cooked parathas in an insulated foil container. Place a paper towel between them to absorb excess steam. This keeps them soft for several hours easily.
- Variation suggestion: Add finely grated onions to the filling for extra crunch. Ensure you squeeze out the onion juice before adding them. This prevents the dough from getting wet and sticky.
- Serving suggestion: Pair the paratha with a side of mint chutney. The coolness of the mint balances the warm Indian spices. It creates a refreshing breakfast experience for your family.
Make This Paneer Paratha Recipe Tonight
You now have the secrets to making perfect parathas at home. This veg breakfast is sure to become a family favorite soon. The combination of crispy crust and soft filling is irresistible. Your home will smell like a professional Indian kitchen today. Try this recipe and enjoy the authentic flavors yourself.

Do not wait for a special occasion to cook this. Every morning is a chance to enjoy a wonderful meal. Your skills will improve each time you roll the dough. Save this recipe and share it with someone who needs it!


