
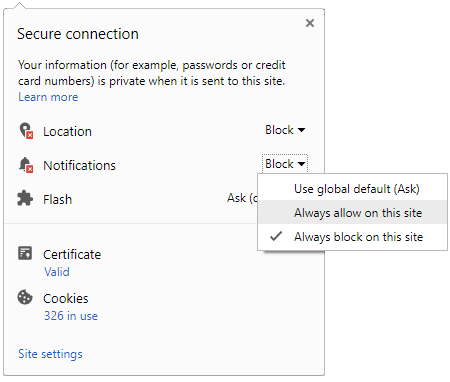
 Click it and Unblock the Notifications


Latest Updates
-
 OTT Releases This Week (October 19–25): New Movies And Series On Netflix, Prime Video, JioHotstar And Zee5
-
 Police Commemoration Day 2026: Know The History, Significance And Programmes Planned Across India This Year
-
 Deepika Padukone And Ranveer Singh Announce Second Daughter’s Name On Dussehra, Share Family Photo
-
 Who Was Karthik Sabesh? Tamil Actor Passes Away At 37, Days After Uncle And Composer Deva’s Death
-
 Who Is Ravleen Varghese? Meet The First Malayali Model To Walk The Victoria’s Secret Runway
-
 World Osteoporosis Day 2026: A Minor Fall, A Major Fracture — Doctor On Why Older Adults Should Be Careful
-
 Durga Visarjan 2026: October 20 or 21? Know Shubh Muhurat, Rituals And Significance
-
 Happy Dussehra 2026: 50+ Wishes, Messages And Greetings To Share With Family And Friends
-
 Dussehra 2026: Astrologer Ashutosh Clairvoyant On Colours, Offerings And Puja Rituals For Each Zodiac Sign
-
 Hustle Culture Has a Bedroom Problem No One Talks About, Expert Explains


A Floating Floor For The Traditional Aesthetic Look

A house becomes cozy with the warmth of wood flooring. Introduce floating floors for the traditional aesthetic look in your home.
Floating floors float atop the sub floor rather than being nailed or glued to a concrete or plywood sub floor. It floats as a unit, expanding and contracting with changes in temperature and humidity. It is installed over most existing floors, including ceramic, vinyl, wood and some indoor/outdoor carpet. Although there are several floating floor materials in the market, engineered floor would be the best choice as it is very stable. Read further to know the guidelines for installing floating floor.
Guidelines for installing a floating floor
Get the required materials before hand lest you have to stop the work in between to gather them later. The required materials would be electric saw, foam undelayment, seam tape, pull bar, tapping block, hammer or mallet, razor knife, expansion shims, safety glasses, wood glue and floating floor panels.
Keep the sub floor clean, level and completely dry. Pay attention to where the flooring will finish and how you will finish the floor at junctions of tiles, carpets or other surfaces. Ensure there are no cracks or loose boards while laying over a timber or particleboard floor.
Select the longest wall to begin while laying the floor. Roll out a section of underlayment and start placing the groove side of the board against the wall with a half panel. This will ease a stagger effect of end joints from row to row.
Leave a small space around the edges as the wood moves with the change in humidity in the room. Do not attach cabinets or fixtures through the finish floor to the sub floor. Use wood or plastic spacers for maintaining the expansion space until the whole work is complete. These steps will not allow the floors to buckle, crack or squeak.
Remove the moldings, wall base and toe kick guard before installing. You can replace it after installation.
You may have to drill the flooring if you want to fit in any pipe or other round objects. At that moment remember to make a hole larger than the size of diameter of pipe. Cut off the area behind the pipes and glue it again perfectly. Cover the pipes with sleeves and fill the expansion space around the penetration with expansive joint sealant.
For installing the last board, saw the board to the appropriate width. Glue the groove and the tongue well. Remove all wedges after the glue is hardened. At the end reinstall the baseboards and install any transition pieces if required. Remember not to nail or glue the moulding to the floorboards, but to the baseboards.
After the flooring is complete do not walk into the floor immediately. Let the glue joints dry for at least 24 hours. Sweep the floor after the installation process is over and check all the joints for evenness.
Care for you new flooring
Cut off a few inch from the bottoms of door, so that they will swing freely over the new flooring. To avoid scratching from grits or stones use doormats at the entrance. Keep the floor clean and wipe it regularly with a damp cloth. Do not use any wax or polish.

 Continue with Google