

 Click it and Unblock the Notifications

Latest Updates
-
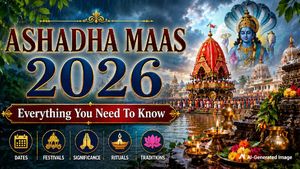 Ashadha Maas 2026: Important Dates, Spiritual Significance, Major Festivals, Rituals And Traditions
 -
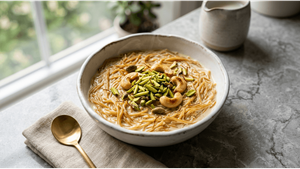 Sweet Vermicelli Quick Sevai Recipe: A Delightful Breakfast
 -
 International Asteroid Day 2026: Date, Theme, History, and Why It Matters More Than Ever
 -
 Horoscope for Today June 30, 2026 - Clear Choices & Steady Progress
 -
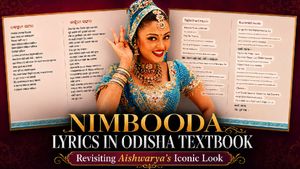 'Nimbooda Nimbooda' Lyrics Found In Odisha Class 5 Textbook: What Made Aishwarya Rai's Look In The Song Iconic
 -
 Shakshuka Recipe: Your Guide to this Middle Eastern Egg Dish
 -
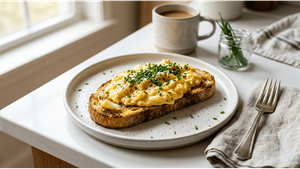 Scrambled Eggs Recipe: Achieve That Perfect Creamy Texture
 -
 Unboxed 2.0: The Queer Art Exhibition Reclaiming Space at The LaLiT New Delhi
 -
 Awarapan 2 Teaser Out: Emraan Hashmi Returns As Shivam Pandit 19 Years Later, Fans Hum 'Toh Phir Aao' Again
 -
 Why Your Back Feels Stiff In The Morning But Improves Later: A Spine Surgeon Shares Insights


19 Must-Have Tools For Your Nail Art Kit
Nail art can be quite fascinating and fun to do. We all obsess over those Instagram accounts with amazing nail arts and wonder about how to do these intricate designs. And, a weekly trip to the salon to get your nails done isn't a practical choice.
Well, nail art isn't as complicated as it looks. You just need some tools and a little practice and you can master the technique of nail art. Wonder what these tools are? Here we have complied a list of all the tools that you would need to take your nail game to the next level.

1. Nail Paint Remover
This is one of those basics that all of us have. To start with a new nail art, first you need to wipe your nails clean. So, add to your kit a nice nail paint remover that doesn't contain acetone so that it won't harm your nails and your cuticles.
2. Base Coat
Applying a base coat is an important step that most of us skip. A base coat is nothing but a layer of transparent polish before you start applying the nail colour. This makes sure that the nail colour doesn't stain your nails and that the nail colour applies smoothly. So before you start applying the nail colour, apply a thin base coat, let it dry completely and then move ahead with the colour of your choice.
3. Basic Nail Paint Colours
Some staple nail paints are a must to include in your nail art kit. An opaque white, a black, a nudish pink, a red and a nude nail paint are a must-have in your kit. Most often than not you will find yourself reaching for them while doing your nail art.
4. Nail Stickers
Nail stickers are another important item for your nail art kit. One that can your your work quite a bit. These come in various colours, shapes and intricate designs. What you need to do is apply the nail colour, wait for it to dry and once it's done stick the sticker on top. Finish this with a layer of top coat.
5. Dotter Tools
While doing nail art, you create various designs, forms, and shapes. A dotter tool will come in handy for that. As the name suggests, you can create dots of various different sizes without a fuzz using the dotter tools. Just dip the tool in the colour of your choice and use it to create dots on your nails. But do make sure to keep your hands steady.
6. Nail Art Stencils
You might have heard of stencils. Nail stencils come in various patterns. You just need to put it on your nails and paint over it to create the pattern on your nails.
7. Nail Glitter
Love some glitters on your nails? Glitter nail art has become quite common. Everyone loves it. Apart from the glitter nail paints you get, you will also find loose glitter that you can use to do your nail art. After you apply a thin coat of your nail paint, use a brush to apply some glitter on it, dust off the excess and apply a layer of top coat. Alternatively, you can apply a coat of nail paint. Follow it up with a layer of transparent nail paint and then dip your fingers in a glitter pot. Brush off the excess and apply a top coat.
8. Rhinestones
Rhinestones are a nail embellishment that will glam up your nail art and give you nails a 3D effect. These come in a variety of colours, shapes and sizes. Apply a coat of your preferred nail colour and gently keep these stones on your nails in a pattern of your choice.
9. Scissors
This might sound weird, but include a small pair of scissors in your nail art kit. They will not only help to give a little shapes to your nails, but also can be used to cut the stickers, stencils, and tapes you use for your nail art.
10. Nail Art Tweezers
Next in the list are some nail art tweezers. These are a little bit different from the normal tweezers. They have sharp and pointed ends and are use to apply the nail embellishments like stones and beads.
11. Cuticle pusher
Cuticle pusher is included in the list because it will give your nails a clean look at the ends. Before you start applying the base coat, use the cuticle pusher to push your cuticles a little inside and give you a clean space to work with.
12. Q-tips
Q-tips can be used to clean up any little mishaps that happen while doing your nail art. You can use them to clean the nail paint that spread around your nails. They can also come in handy for some nail arts.
13. Nail Art Brushes
Nail paint brushes are an important tool for your nail art kit. You will get a nail art brush set that contains a set of brushes with different shapes. Each of the brushes has a different use and hence are a must-have in your kit.
14. Striping Tape
Stripping tape can either be used to add an oomph factor to your nail art or to create crisp lines while doing the nail art. These are very thin and come in a variety of textures.
15. Beads
Beads are another nail art embellishment that you can use in your nail art. Create various designs using these while giving your nail a 3D effect.
16. Make-up Sponge
Ever wonder how they do such a clean ombre nail art? Well, a make-up sponge is the trick. Use a make-up sponge to create that ombre effect on your nails. For this, put different layers of the colours of your choice on the make-up sponge and dab this sponge on your nails. Repeat this process until you get the desired effect. Finish it off using a top coat.
17. Toothpick
A toothpick can also be used to put the nail embellishments such as beads and rhinestones on your nails. So, put a toothpick in your nail art kit. You never know when you need it.
18. Nail Filer
Nail filer is another basic that you need to have. Use a nail filer to give the desired shape or length to your nails before you start with the nail art.
19. A Top Coat
A top coat seals the deal. After you have done the nail art, apply a layer of top coat to smoothen everything out and give it a clean look. It is but a transparent nail paint that can also help to cover up little mistakes. Let the nail nail paint dry and the nail art to settle down before applying the top coat.