

 Click it and Unblock the Notifications

Latest Updates
-
 Lakmé Fashion Week 2026 Highlights: Siddharth To Aneet Padda, Celebrities Who Made Runway Looks Wearable
 -
 Badshah And Isha Rikhi’s Marriage Rumours Explode After MIL’s Post—Reality Check Inside
 -
 Children And Bones: Why Backyard Play Still Beats Screen Sit-Downs for Joint Health
 -
 World Tuberculosis Day 2026: Could That Normal Cough Be Something More? Signs You Should Not Ignore
 -
 Bank Holidays in April 2026: Full List, Key Dates, and What to Expect
 -
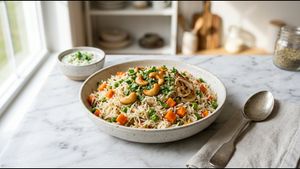 Homemade Style Vegetable Pulao Recipe: A Flavorful Lunch Delight
 -
 Black, Bold, and Brilliant: Priyanka Chopra Shines at Bvlgari Milan Showcase
 -
 Emraan Hashmi Birthday Special: Inside The Five-Year Fight That Changed His Life As A Father
 -
 World Tuberculosis Day 2026: Date, Theme, History, and Significance Explained
 -
 Yamuna Chhath 2026 Significance: Why Taking A Dip Or Offering Water Feels Spiritually Powerful


Kachori Recipe: Crispy Like Restaurant Perfection
Everyone loves the sound of a perfect crunch when biting into a snack. Many home cooks struggle to replicate that specific restaurant texture at home. This crispy kachori recipe solves that common problem with ease. You will learn the hidden secrets of the trade today.
Most people face the issue of kachoris turning soft after cooling. Our special veg filling technique ensures a flaky crust that lasts for hours. We focus on the exact science of temperature and fat ratios. This guide makes professional results possible in your own modern kitchen.

The secret to a perfect snack lies in the preparation of the dough. Many beginners skip the crucial step of rubbing fat into the flour. This process creates a waterproof barrier for the gluten. It results in a melt-in-the-mouth texture that everyone craves during tea time.
Achieving that deep golden color requires a very specific frying method. High heat is the enemy of a truly crispy kachori recipe. We will teach you how to control the oil temperature perfectly. This ensures the stuffing cooks well while the outer shell remains light and crisp.
Why Everyone Is Talking About This Kachori Recipe
This version of the classic snack stands out because of its incredible texture. Most recipes result in a bread-like outer layer which is quite disappointing. Our method uses a precise amount of ghee to create a shortcrust finish. This technique creates those beautiful tiny bubbles on the surface.
The flavor profile is balanced between spicy, tangy, and slightly sweet notes. We use a unique spice blend that mimics high-end Indian sweet shops. The moong dal filling is roasted until it releases a nutty aroma. This prevents the filling from becoming soggy or losing its punch over time.
Home cooks are loving this recipe because it is very reliable. You do not need expensive equipment or rare ingredients to succeed. The step-by-step approach removes the guesswork from the kneading and frying stages. You will feel like a professional chef once you see the final results.
Recipe at a Glance
| Feature | Details |
|---|---|
| Prep Time | 30 Minutes |
| Cook Time | 40 Minutes |
| Total Time | 70 Minutes |
| Servings | 4 People |
| Difficulty | Medium |
| Cuisine Type | Indian |
| Meal Type | Snacks |
| Calories (approx) | 280 kcal |
Ingredients You'll Need for Kachori
Gathering fresh ingredients is the first step toward a perfect snack. Ensure your spices are pungent and your flour is sifted for the best results. High-quality ghee makes a significant difference in the final aroma. Here is everything you need for this delicious veg treat.
| Category | Ingredient | Quantity |
|---|---|---|
| Main Ingredients | All-Purpose Flour (Maida) | 2 Cups |
| Main Ingredients | Yellow Moong Dal (Soaked) | 1/2 Cup |
| Main Ingredients | Ghee (Melted) | 1/4 Cup |
| Main Ingredients | Water | As needed |
| For the Spice Mix | Fennel Seeds (Crushed) | 1 Teaspoon |
| For the Spice Mix | Coriander Seeds (Crushed) | 1 Teaspoon |
| For the Spice Mix | Amchur (Dry Mango Powder) | 1/2 Teaspoon |
| For the Spice Mix | Garam Masala | 1/2 Teaspoon |
| Optional Garnish | Fresh Coriander Leaves | 2 Tablespoons |
| Optional Garnish | Fine Sev | For topping |
How to Make Kachori Step by Step
Prep Phase
- Mix the flour, salt, and melted ghee in a large mixing bowl. Rub the ghee into the flour until the mixture looks like breadcrumbs. This ensures the crust becomes very flaky.
- Add cold water gradually to the flour mixture to form a dough. The dough should be smooth but firm to the touch. Cover it with a damp cloth for twenty minutes.

Cooking Phase
- Coarsely grind the soaked moong dal without adding any extra water. Heat a small amount of oil in a pan over medium heat. Sauté the crushed spices until they become very fragrant.
- Add the ground dal and the remaining spice powders to the pan. Cook the mixture for ten minutes while stirring constantly to prevent sticking. The filling should be dry and crumbly.
- Divide the rested dough into eight equal portions and roll into balls. Flatten each ball with your palm to create a small disc shape. Place a spoonful of filling in the center.
- Gently bring the edges of the dough together to seal the filling inside. Remove any excess dough from the top to keep the seal thin. Press the ball flat again very carefully.
Finishing Phase
- Heat oil in a deep pan on a very low flame setting. Slide the prepared kachoris into the oil while it is still lukewarm. This is the secret to a professional crunch.
- Fry the kachoris for fifteen minutes until they turn a deep golden brown. They will slowly float to the top as they cook through. Drain them on a paper towel before serving.

Pro Tips for Veg Kachori
- Most common mistake: Frying in hot oil causes the crust to develop large blisters. Always start with cool or lukewarm oil for a smooth finish.
- Secret technique: Add a pinch of baking soda to the dough for extra lightness. This creates tiny air pockets that enhance the overall mouthfeel.
- Storage tip: Store cooled kachoris in an airtight container for up to three days. You can reheat them in an oven to restore their original crispiness.
- Variation suggestion: Swap moong dal with spiced peas for a delicious seasonal twist. This green pea filling is a popular winter variation in many homes.
- Serving suggestion: Serve these hot with a side of spicy potato curry. A dollop of sweet yogurt also helps balance the intense spice levels.
Make This Kachori Tonight
There is nothing more satisfying than serving a snack that sounds as good as it tastes. Your family will be impressed by the professional quality of these homemade treats. The combination of the flaky crust and savory filling is truly unbeatable.

Follow these steps closely to avoid the typical pitfalls of deep frying. You now have the knowledge to create restaurant-quality snacks in your own kitchen. Save this recipe and share it with someone who needs it!


